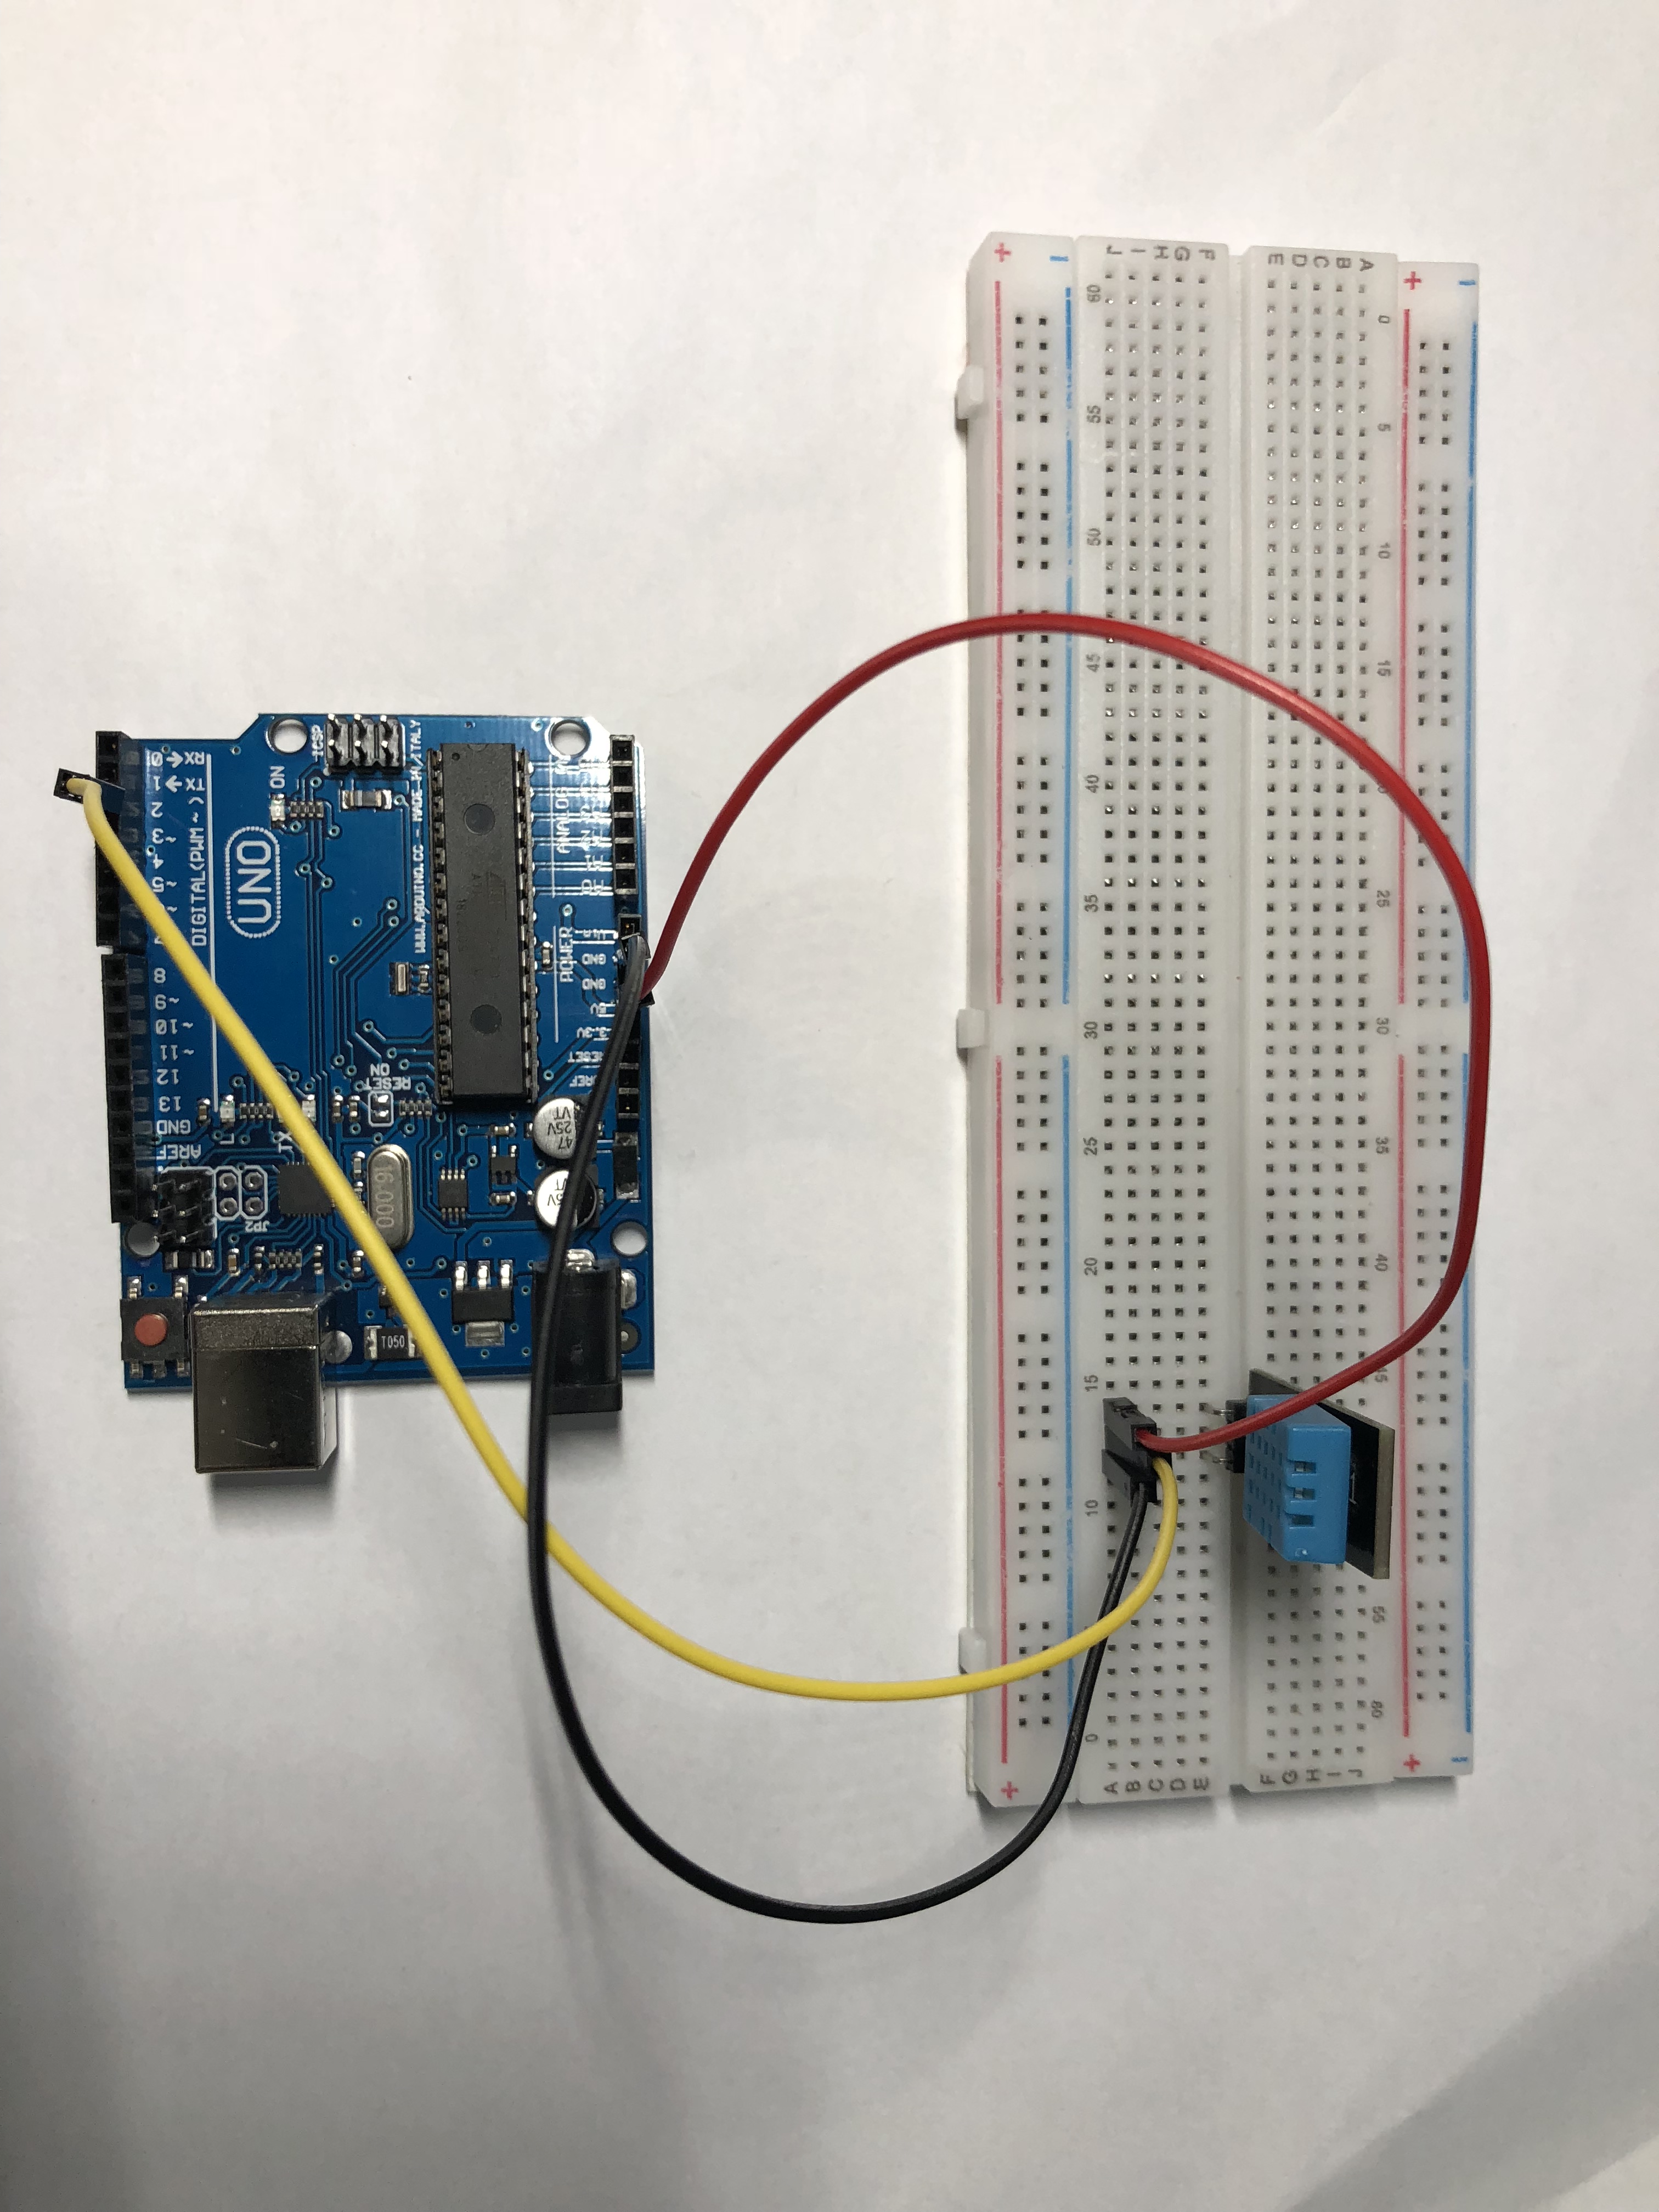
Components needed
- DHT11 Sensor
- Jumper cables
- A breadboard
- An Arduino Board
- A computer with the Arduino IDE installed
Completed Circuit

The Program
#include <DHT.h>
#include <DHT_U.h>
DHT dht(2, DHT11);
float tempInCelcius;
float tempInFarenheit;
float humidity;
void setup() {
Serial.begin(9600);
Serial.println("Humidity and Temperature Sensor Program");
dht.begin();
}
void loop() {
delay(2000);
tempInCelcius=dht.readTemperature();
humidity=dht.readHumidity();
tempInFarenheit=tempInCelcius*9/5+32;
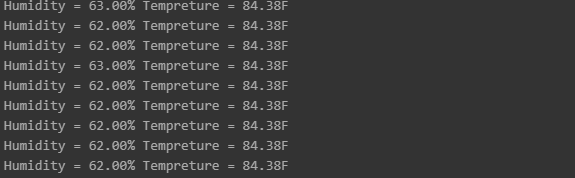
Serial.print("Humidity = ");
Serial.print(humidity);
Serial.print("%");
Serial.print(" Tempreture = ");
Serial.print(tempInFarenheit);
Serial.println("F");
}
This is the completed program for the DHT11 Temperature and Humidity Sensor. As you can see we included two libraries, DHT.h and DHT_U.h. We are using the library to read the temperature and humidity out of the sensor.
On line 5, we are declaring the object of library DHT. The declaration takes two parameters. The pin number, where sensor is connected to and type of sensor. In our circuit, we have connected sensor’s output pin to digital pin number 2 on the board and the type of sensor we are using is DHT11.
We have declared 3 variables, tempInCelsius, tempInFarenheit, and humidity of the type float.
In the setup function, we are setting up the serial communication with Serial.begin(9600). After that, we are initializing the library with dht.begin. You can look more about the DHT library at https://github.com/adafruit/DHT-sensor-library
In the loop function, we are first starting off by delaying for 2 seconds. We are reading the temperature using the dht.readTemperature using the library. This gives the tempreture in Celsius. Later we converted the temperature from Celsius to Fahrenheit using the formula F=C*9/5+32. We are also reading the humidity using the dht.readHumidity function.
Finally we are printing the humidity and temperature using the Serial.print function into the serial monitor.