
Components needed
- RGB LED light
- 3 resistors
- 5 jumper cables
- Arduino Uno Board
- Breadboard
- An USB Cable to download the program to the board.
- A computer with an Arduino IDE installed
Completed Circuit


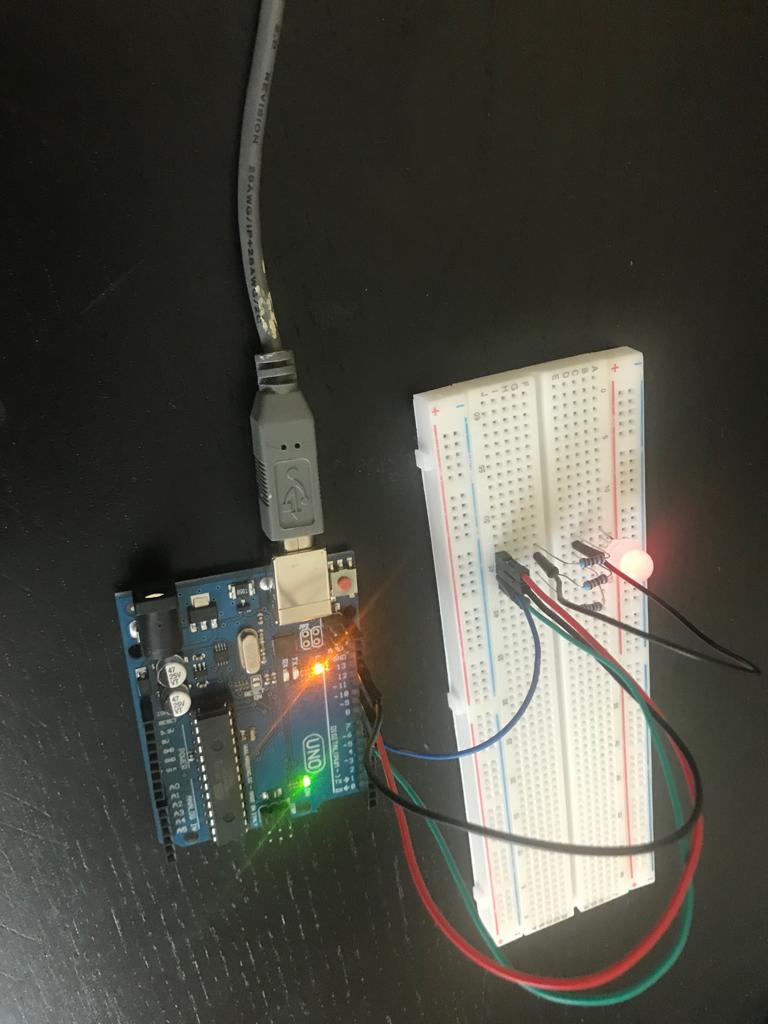

The image above is the completed circuit to make an RGB LED change colors. An RGB LED is basically a combination of 3 LEDs, one Red, one Green, and one Blue. The RGB LED has 4 pins. One is for ground, and the other three are red, green, and blue, as shown in the image below.

The ground pin of the RGB LED is connected to the ground pin of the Arduino board. The other 3 color pins are connected to different pin numbers on the Arduino board. As we discussed in the previous blog, we must put a resistor for the red, green, and blue pin. If we don’t use the resistor, then our LED will blow up.
The Program
int redPin= 11;
int bluePin= 10;
int greenPin= 9;

void setup()
{
  pinMode(redPin, OUTPUT);
  pinMode(bluePin, OUTPUT);
  pinMode(greenPin, OUTPUT);
}

void loop()
{
  analogWrite(redPin, 255 );
  analogWrite(bluePin, 0);
  analogWrite(greenPin, 0);
  delay(1000);
  analogWrite(redPin, 0 );
  analogWrite(bluePin, 255);
  analogWrite(greenPin, 0);
  delay(1000);
  analogWrite(redPin, 0 );
  analogWrite(bluePin, 0);
  analogWrite(greenPin, 255);
  delay(1000);
}
Create a new file in the Arduino IDE, then copy the program above, then paste it in the IDE. As you can see, we have declared three variables for three different pins, instead of hard-coding pin numbers in the program. This would make it easier if we want to use a different pin on the board later.
In the setup function, we set all three pins for the output mode using the pinMode function. That’s all we need to do for setup.
In the previous blog, we used digitalWrite, because we wanted to turn an LED on and off, but in this case, we want to give a different amount of power to each pin to produce different brightness. In an RGB LED, each pin can take any number between 0 to 255. To do that we will use the analogWrite function. Giving 0 will turn off the LED (or you can say no brightness) and giving 255 will give full brightness to that LED. For example, to produce the red color, we can pass 255 to the redPin, and 0 to the blue and the green pin. That means the RGB LED can produce 255*255*255, which is about 16 million different colors, using the different combinations of R, G and B value.
So in the loop function, first we are setting the red color in the RGB LED by giving 255 to red pin and 0 to the green pin and the blue pin. Then, we are wait for a second using the delay function. Similarly, we are doing this for the blue pin and the green pin.
That’s it. That’s all. I hope you guys find this helpful. We will extend this project in my next blog to show all 16 million colors.

Great work Aarav! Keep it up!
LikeLiked by 1 person
Good work
LikeLiked by 1 person
this LED is way cooler than the first one. its getting fun. keep it coming…. 🙂
LikeLiked by 1 person